
Introduction
This guide explains how to integrate Sitecore CDP (Customer Data Platform) with a Next.js XM Cloud project. By connecting your XM Cloud frontend to Sitecore CDP, you can track sessions, send page view events, identify users, personalize content, and capture commerce interactions such as add-to-cart, checkout, and order confirmation events.
Steps to Integrate Sitecore CDP using the Sitecore Engage Package
- Install the Sitecore Engage SDK
Add the Engage SDK to your Next.js project to enable communication with Sitecore CDP. - Create an Engage Client Instance
Configure and instantiate the Engage client with your organization’s credentials and environment settings. - Initialize the Connection
Use the init method to establish a secure connection between your application and Sitecore CDP. - Send Page View Events
Trigger page view events on route changes to track user interactions and sessions in CDP. - Verify Guests in Sitecore CDP-Once events are flowing, you can confirm users are tracked in Sitecore CDP → Guests tab.
Step 1: Install the Sitecore Engage SDK
The first step is to install the Sitecore Engage SDK into your Next.js project.
Open your terminal inside the project folder and run:
Step 2: Create an Engage Client Instance
Once the package is installed, you need to configure your Engage client.
Create a helper file, for example:
Here:
- clientKey → Found in CDP → Settings → API Access → Client Key(create new if needed).
- targetURL → Region-based endpoint from CDP → Settings → API Access → Target URLs.
- pointOfSale (POS) → Your site’s identifier from CDP → Settings → Point of Sale (create new if needed).
Step 3: Initialize the Connection
We now need to make sure the Engage client gets initialized when our app starts. In Next.js, the best place to do this is in _app.tsx.
Step 4: Send Page View Events on Route Changes
We need to listen for route changes and send a pageView event each time.
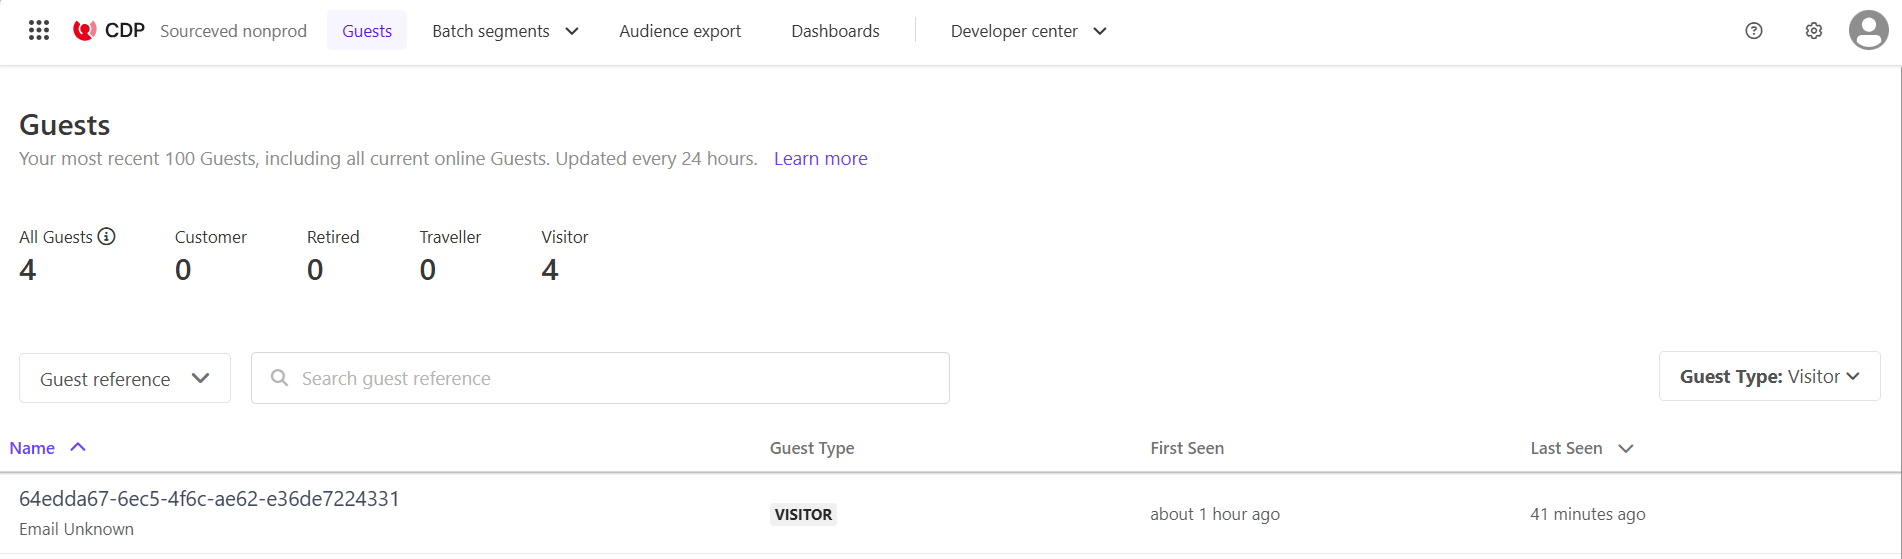
Step 5: Verify Guests in Sitecore CDP
Once events are flowing, you can confirm users are tracked in Sitecore CDP → Guests tab.
1. Guest User (Anonymous Visitor)
When a new visitor lands on your site, Sitecore CDP creates a unique Guest Reference ID.
At this stage, the visitor is anonymous and shows as “Email Unknown.”
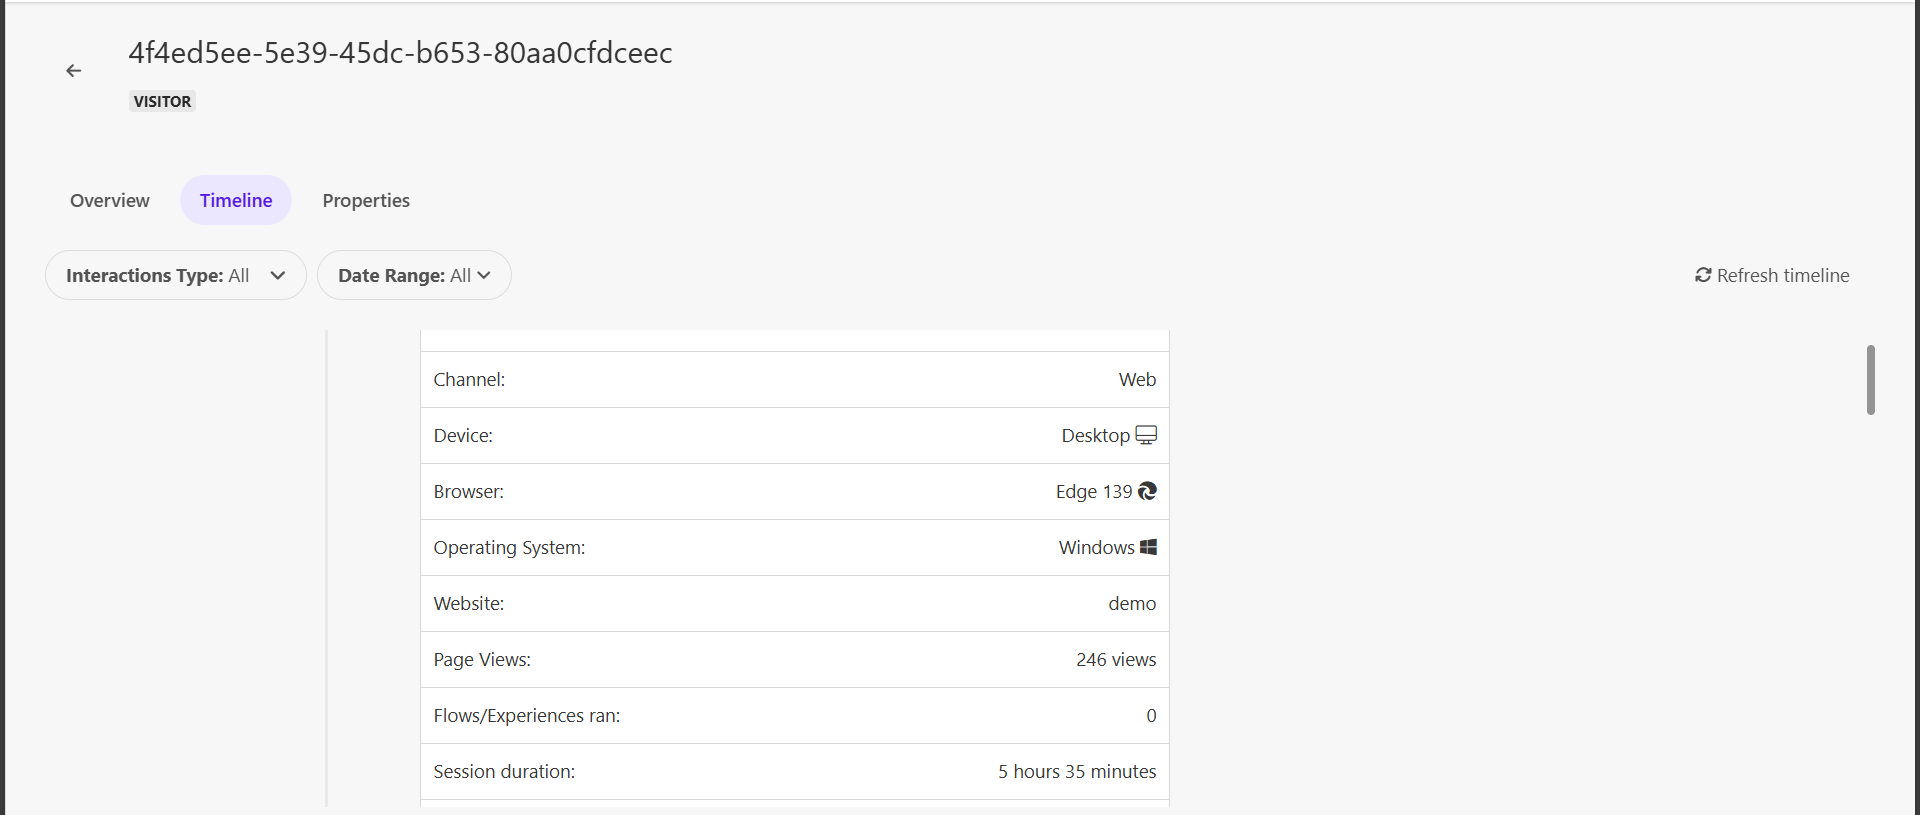
2. User Details (Automatic Data Captured)
Even without identity, CDP automatically tracks useful details about the visitor, such as:
- Search keywords (from campaigns, UTM parameters, or site search).
- Browser and device details (e.g., Chrome on Windows, Safari on iPhone).
- Session activity (page visits, interactions, time on site).
3. Identity (Known Visitor)
When an identity event is sent (e.g., login, registration, or form submission), the guest profile is enriched.
Now, the profile shows email, first name, and last name, instead of “Email Unknown.”
This merges all anonymous history with the known user profile.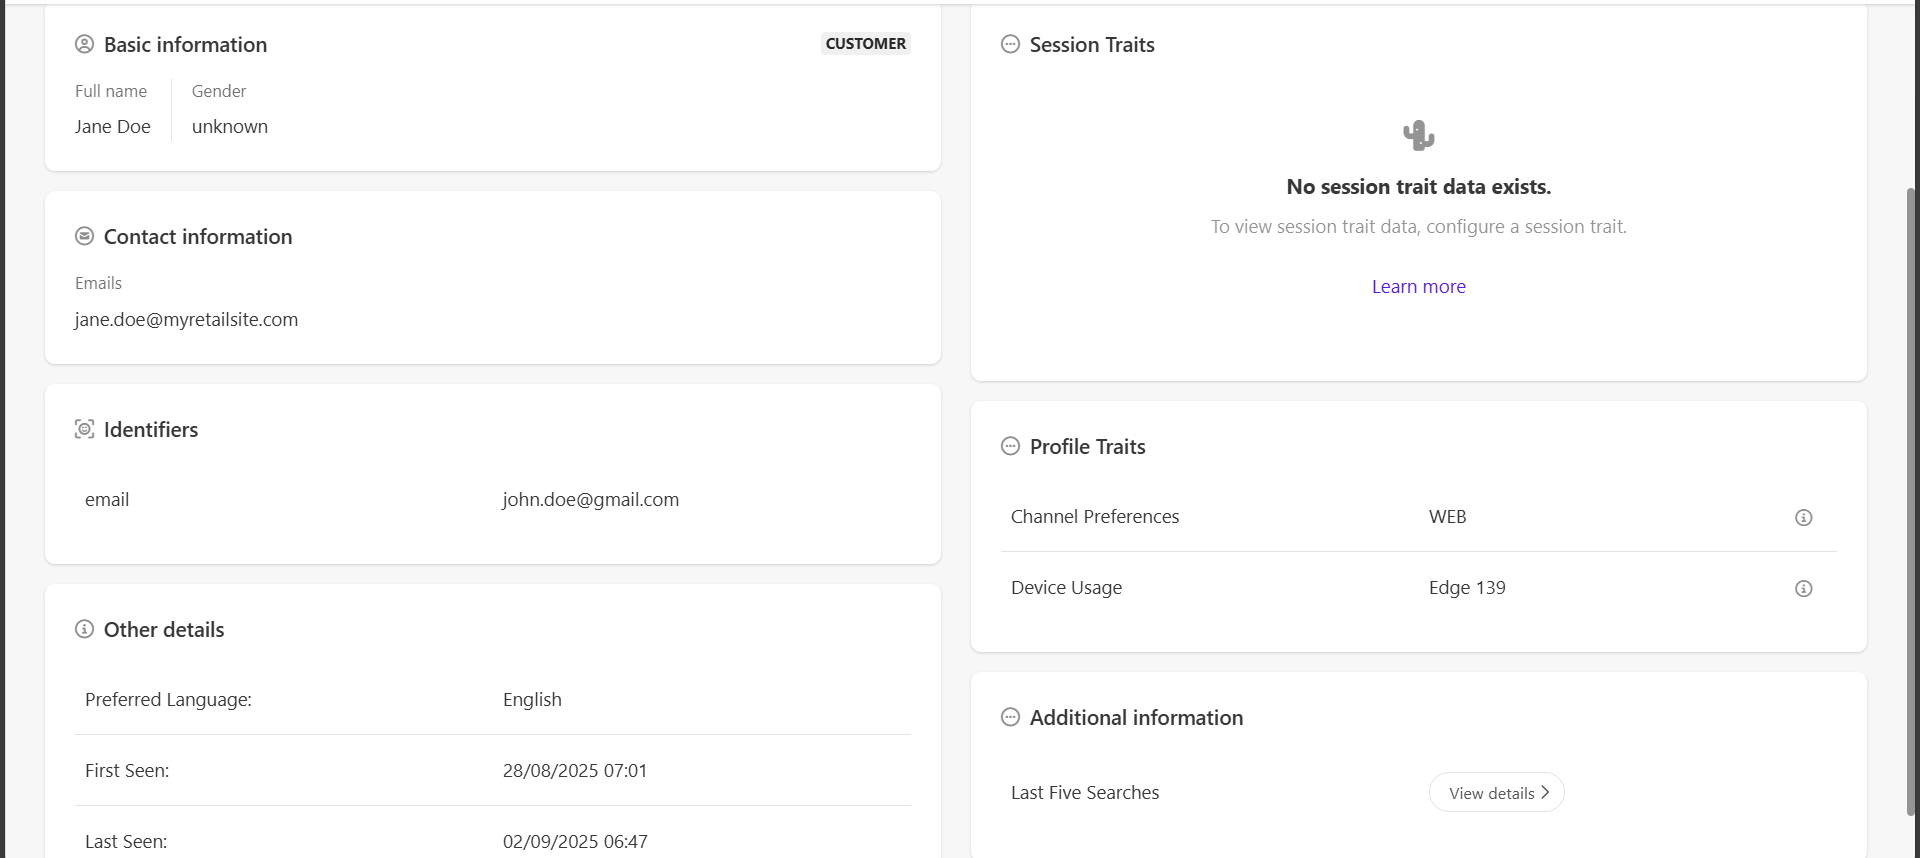
Final Thoughts
By integrating Sitecore CDP with your Next.js XM Cloud project, you unlock:
Real-time tracking of sessions & page views
Personalized user experiences
Commerce event tracking (add-to-cart, checkout, orders)
Guest-to-known user profile merging
This setup ensures your XM Cloud frontend is fully connected with Sitecore CDP, enabling 360° customer insights and personalization.


